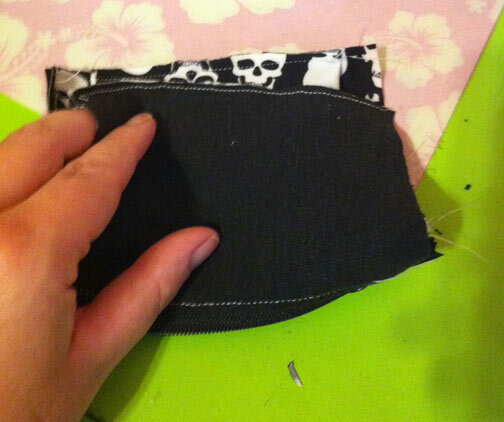
Way back when I was running regularly, I always struggled to find a way to carry my basics that wasn’t intrusive. I didn’t like arm bands and waist bags never felt right. Eventually I started making these little spandex wrist wallets and I liked them so much this is now the only wallet style I use. I am prone to always thinking I’ve lost my wallet and panicking; this has saved me a LOT of grief.
And they go together really quickly. I like to make a few at a time, so you’ll see some different fabrics here. You really only need some scraps for this one, which makes it a good way to use those fabric pieces you can’t bear to toss, but that have few uses.
Because this is made with spandex, the sizing is pretty forgiving. I would say I have an average size wrist for a woman, and I came up with this for myself. If you need to make adjustments for wrist circumference, I’ll tell you where to do that below.
Here’s what you’ll need:
Old T-shirt or stretchy fabric scraps
Spandex scraps
Small zipper (I like the 4” ones, but you can cut down a longer one)
Thread, scissors, etc. — the basics!
The FIRST thing I do is cut a reinforcing lining fabric for the pouch. I usually use an old T-shirt or some other fabric scrap that’s a little stretchy but not as stretchy as my spandex, to give the pocket a little more body.
Cut 2 pieces of lining 5 inches by 3.75 inches. Orient the fabric so it stretches most across the 3.75 inch width.
Next, cut 2 pieces of your spandex fabric in the same size.
Next up, you’ll need to cut a piece of your spandex for the section that goes around your wrist. This piece should be about 5.5 inches by 8 inches, with the most stretch across the 5.5 inches. Behold, this confusing pattern piece I made myself forever ago! You only need to cut one of these.
Note: This is the piece to change if you need to adjust for bigger or smaller wrist circumference. It’s the 5.5 measurement you want to change. For a smaller wrist, you can try it at 5" inches; for a larger wrist, go up to 6 inches.
To start sewing, fold your biggest piece so that the two 5.5 inch edges are right sides together, and sew along that edge using a stretch stitch if your machine has one. If it doesn’t, a zigzag will do!
Turn the little tube you’ve made right side out. Align the seam so it sits in the middle of one side of the tube.
Next up: sewing the pouch fabric to the zipper!
Sandwich your fabric and zipper together so that you have your lining fabric at the back, the zipper on top of that right side facing up, and the exterior fabric right side down, aligning the cut edged along the zipper tape edge.
Stitch all three layers together about 1/4” in from the edge. A zipper foot will help you here, but if you have a sewing machine that lets you align your needle to the left, that also works fine and is usually how I do it.
Repeat this step on the other side of the zipper with you remaining pieces of fabric and lining for the pouch.
Turn out the fabrics you just stitched, so they sit like wings to each side of the zipper, and top stitch along each edge about 1/16 of an inch from the fold. Be careful to make sure your lining layer is fully folded outward. If you wish to press before this step, be careful with heat and spandex — keep your iron on a low setting and test a small piece first.
After you top stitch near the zipper, baste the lining to the exterior fabric around all raw edges of the pouch fabrics. going forward, you’ll just treat those two layers as though they’re on piece of fabric.
Take the tube you made from spandex and place it seam side down on the right side of your zipper/pouch assembly. Align it so the raw edges of one end of the tube sit about 3/8 - 1/2 inch from the top stitching next to the zipper.
Sew the tube to the pouch fabric, through all thicknesses, about 1/4 inch from the raw edge.
Flip the tube to the left and top stitch a little more than 1/4 inch from the edge of the fold. (You’re hiding the raw edge of the tube underneath.)
Flip the tube back to the right and baste the remaining raw edge of the tube to the right hand edge of the pouch assembly.
At this point, you have created the wrist band that your hand will slide into. You can test it for fit and adjust as needed.
Open up your zipper before continuing. Otherwise, you’ll stitch your wallet permanently inside out!
Once it’s open, fold the pouch section along the zipper as the fold, so all the raw edges meet up and your fabric is facing right sides together and your lining is on the outside. You’ll want to make sure your wrist tube is tucked into the inside-out pouch.
Sew along the 3 fabric edges of your pouch, catching it the raw edge of the tube along the long edge. If you like, you can also zigzag around these edges to make sure it’s secure. (I usually check to make sure I didn’t accidentally catch in any of the loose strap fabric first.)
Turn your wallet right side out through the open zipper, and voila! You’re ready to stash your necessities and go on an adventure!
I sometimes fine that the end of the zipper tape flaps around and is annoying; in those cases, I just tack those into the interior of the wallet with some hand stitching or even a quick straight stitch on the machine if I’m being lazy.


