Lace crowns are experiencing a serious uptick in popularity right now -- and why not? They're darling! They also combine the best elements of princess style, DIY and shabby chic. Bonus appeal: you can probably find some bits of lace trim long enough to start this project already lurking in your stash.
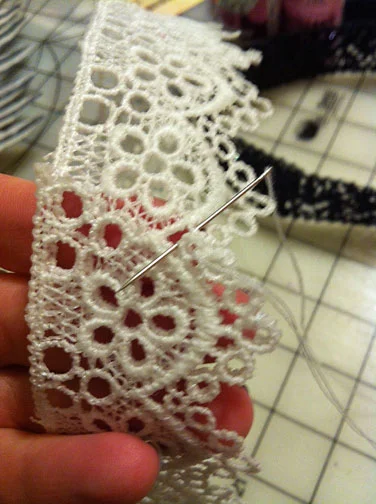
This project is pretty easy, though there is some mess involved. First off, you have to soak your lace trim in fabric stiffener for a little while. This photo shows me dragging my lace through the stiffener to make sure it got fully coated before I mushed the whole piece into the liquid.

Once your lace is well-coated with fabric stiffener, you just need to squeezed out any excess and lay it flat. Remember to protect your work area with a non-porous covering -- I just used a trash bag.

Here is a piece of dry lace next to the wet, stiffener soaked piece, just so you get a sense of what to expect:

Unlike the photo above, you'll probably want to have multiple pieces drying at once so you can optimize your time.
Once your lace is fully dry, you can start playing! (Note: If your lace is dry but not as stiff as you'd like, you can apply another coat of fabric stiffener, I just brush it on in this case, being careful not to let the liquid collect in the gaps of the lace.)
If you're making full-circle crowns, you'll need to close them up. Some people use glue here, but I like to stitch mine. Either way works just fine. You want to overlap your ends a little, and if possible, line up the repeat design of your lace to hide the join.
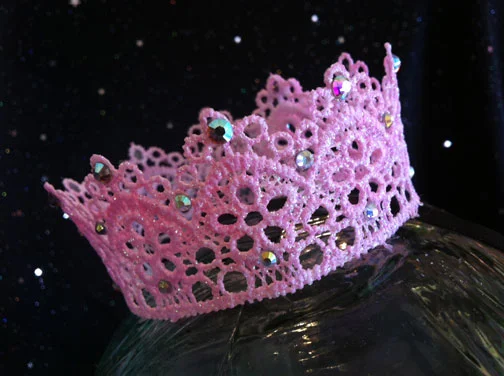
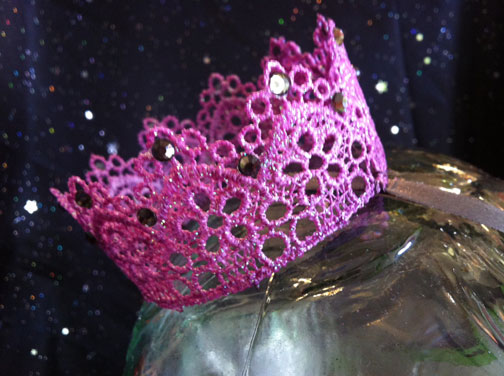
Once your crown is sewn or glued into its circle shape, you can paint it any color you like! You can use spray paint or craft paint with a brush (again, be careful to keep the paint from filling in the holes in your lace and obscuring the design). Here's a mini-crown, painted purple:

The best thing about this project is how creative you can be with embellishments. For this full-size crown, I kept it simple, and just painted it silver and added a sparkly pin from my jewelry drawer:

You can also coat your crown with a thin layer of Mod Podge and apply glitter:

Only have a small amount of a lace trim, but you love it and want to make something out of it? No problem! Just make a tiara instead of a crown:

For the tiara, I tacked each end of my lace to a headband with a series of small stitches, and then put a daub of glue over the stitching for extra security. This can be worn tiara-style as shown above, or as a fancy headband by situating it so the lace sits flat against your head. I embellished this one with a few hot fix crystals.

And then, my favorite variation on the lace crown project -- tiny crown fascinators:

Like the tiara, these are just attached to a headband with small stitches and glue. These two are painted with pink and purple paint with a bit of glitter mixed in, and then embellished with rhinestones. (I am clearly madly in love with my hot fix applicator.)

There are so many more ways to play with this project! You could add buttons, ribbon, fabric flowers -- anything that will glue or sew on is fair game! You could make these up as amazing favors for a princess party -- or just make the basic crowns and let the princesses decorate them. It's a really inexpensive project, so you can experiment and play with a bunch of designs without worrying to much about cost or waste. That's a good thing, because I already have a bunch of ideas for my next batch ...