
Silhouettes and cameos have been enduring icons of art for as long as I can remember. And with good reason; the simplicity of such items gives them a versatility that's incredibly appealing. Any visage can be silhouetted.
I wanted to make a bag that borrows from the style of cameos and silhouettes, and give a nod to a classic Disney villain: Maleficent. After all, is there any silhouette more memorable?
This is a relatively simple project, and while I made a bag, you could just as easily use the same method to create a pillow, a patch, a detail on a skirt -- you name it.
To begin, I searched for black and white, simple art online, and then did a bit of tracing.
I actually traced the image twice -- first onto plain paper, and then a second time onto tissue paper. The tissue paper (which is recycled from a gift bag I received at some point in time) is too thin to safely trace onto with a marker for fear that the ink would bleed through to my tablet screen. Once I traced the image the second time onto the tissue, I cut an oval around the design. This became my pattern for the whole project.
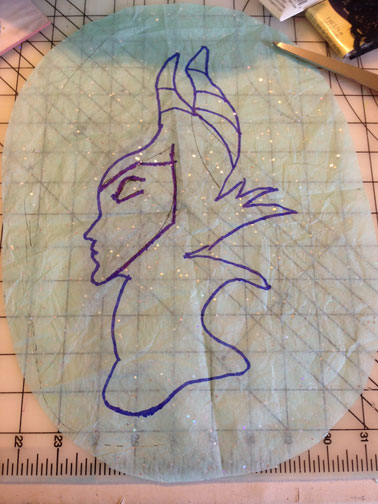
I cut one layer of my entire oval out of sateen, two layers out of faux suede, two layers of satin for lining and a layer out of fleece. To create the front piece of the bag, I made a stack of pieces that started with the fleece layer, then the sateen layer, then a faux suede layer, and placed my pattern on top.

Then I stitched over the lines of my drawing. I flipped the whole thing over so you can see what the stitching looks like on the back fleece layer.

Once the stitching was complete and I clipped all my loose threads, I tore the tissue paper away. For the little nooks and crannies, I used tweezers to help pull stray paper from the stitches.

Then I carefully clipped the top layer of fabric away, about 1/16 to 1/8 of an inch from the outermost stitching line. I used faux suede to avoid fraying, but something like vinyl or leather would also work -- anything that won't come apart at raw edges.

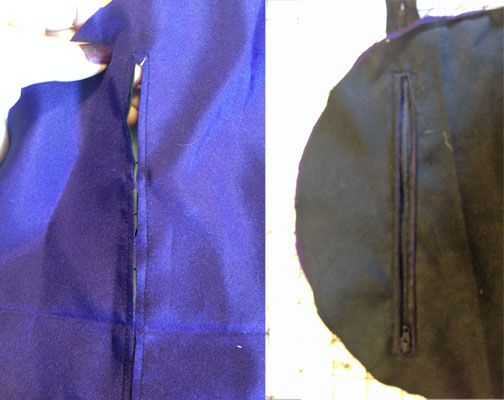
To prep the back and install the zipper, I drew a line across the bag lining where I wanted the zipper to sit, then stitched a narrow box around it through the lining and my second piece of faux suede, right sides together. Because my suedey fabric is fairly stiff, I didn't bother with interfacing it, but if you use a fabric with a drapey body, you might want to add some interfacing or an interlining. I clipped the narrow box and turned my lining to the inside, pressed the folded edges, and then stitched my zipper into the opening from the outside. (Apologies for the fuzzy photos here -- they looked OK on the preview screen, but not so much at full size!)
Once my zipper was in place on the back of my bag, I basted the front and back together (adding in the lining layer for the front as well). So at this point along the edges, I have sateen, fleece, lining, lining, faux suede.

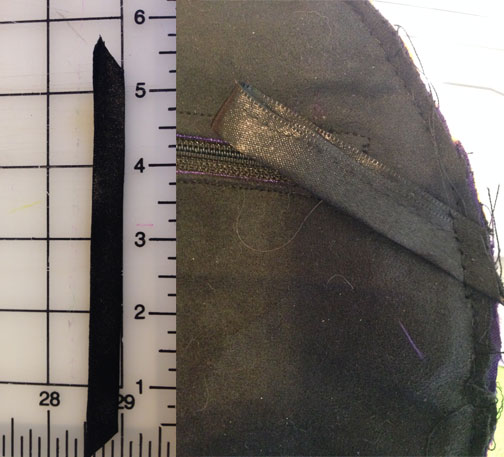
To make loops to clip a strap to, I folded a 12-inch piece of 1-inch wide ribbon in half lengthwise and stitched it closed like a tiny tube. Then I ironed it flat. I cut two pieces from it, each a little shorted than 6 inches, and I basted those at an angle to the back side of the bag.
Then I used bias tape to stitch eveything together and enclose all the raw edges. I wasn't especially careful here, as the tape edges would all soon be covered.

The last step was to stitch a length of decorative lace all around the exterior edge, covering the bias tape and mimicking a pendant setting for a cameo or a frame for a silhouette. Then I clipped a strap I had to the ribbon loops at the back and voila! Ready to hit the town (and go to a Disney park)!
